
Portal Training: Microsoft 365 for Business
Welcome to the new Opkalla Microsoft Customer Portal! To locate the portal, you can go to portal.opkalla.com. Before signing in, you will need to register using an Invitation Link. To request an invitation, you can reach out to support@opkalla.com.
Once you have registered successfully, you can access the portal going forward by selecting Sign In and enter your Single Sign-On (SSO) credentials if prompted:

On the Homepage of the Portal, you can find:
Blogs about the newest Microsoft products, features and capabilities
Opkalla’s Microsoft Solutions Partner for Modern Work badge demonstrating our best-in-class expertise in Microsoft 365.
To navigate through the Portal, you will use the Manage My Services menu:
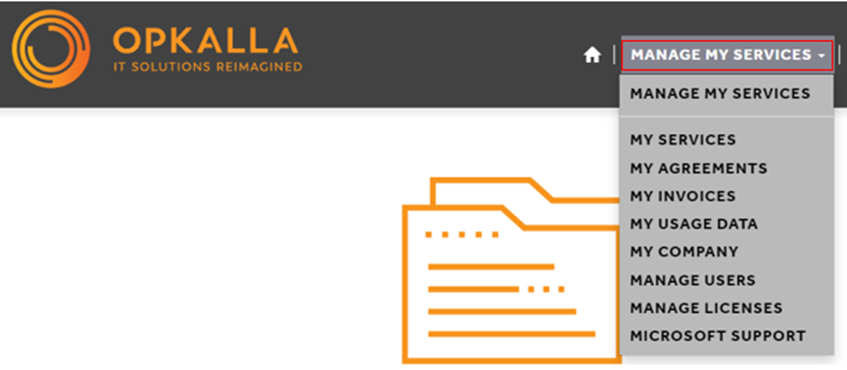
My services
On the My Services page, you can manage the quantity for your Microsoft subscriptions and add new services from our Product Catalog.
To manage the quantity for your Microsoft subscription, you will need to select the drop-down under the Billing Contract then click on the Subscription Name. To locate add-on subscriptions, you will need to select the “plus sign” beside the base subscription:

On the Subscription Edit page, you will need to update the Quantity and Change Effective section. Under the Change Effective section, you have “Immediately”, “On Renewal” and “Custom”. If you select “Custom” the Effective Date section will populate for you to select the specific date:

Once you have updated the Quantity and Change Effective/Effective Date section, you will need to select Submit. To see a history of all transactions, you can go to Change Logs and to see any upcoming changes, you can go to Future Changes:

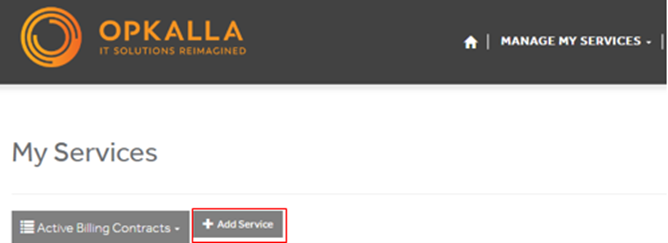
To purchase a new Microsoft product, you can select Add Service to go to the Product Catalog:
On the Product Catalog page, select the “Billing Contract” then you can search for the product and select Buy beside the specific term:

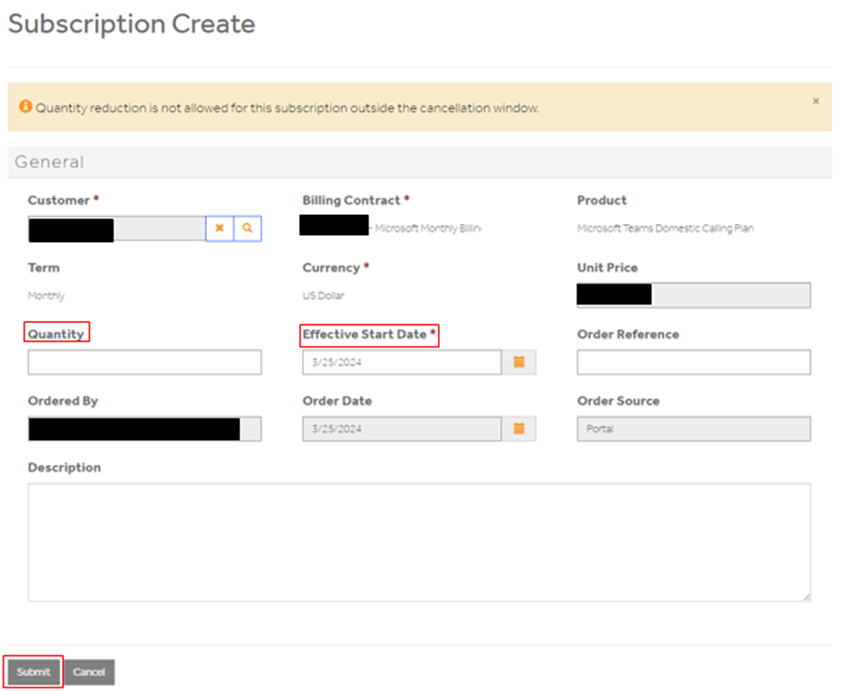
Once you select Buy, it will take you to the Subscription Create page for you to update the Quantity and Effective Start Date then select Submit:
My agreements
You can locate your Microsoft Customer Agreement by going to the My Agreements page. From there, you can select the drop-down to see Accepted Agreements and Pending Agreements:

My Invoices
You can locate your invoices by going to the My Invoices page. From there, you can select the drop-down to see Open Invoices and Paid Invoices:

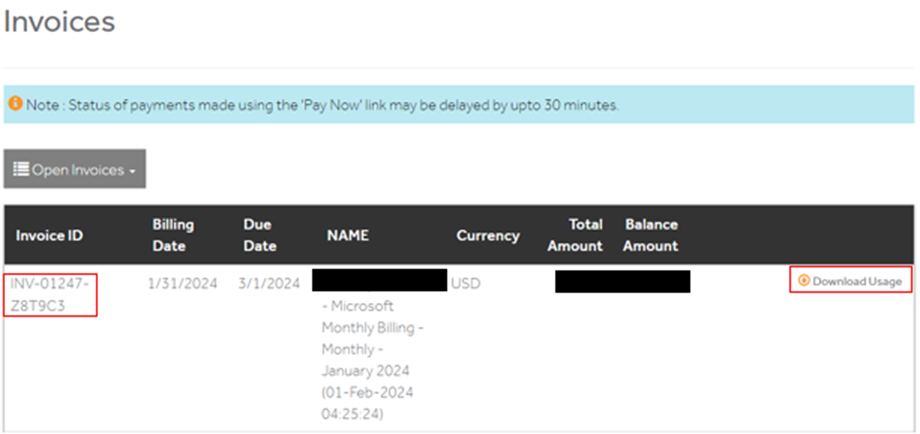
To see a breakdown of the Microsoft 365 subscription cost, select the Invoice ID and for Azure usage, select Download Usage:
Usage Data
If you have an Azure subscription, you can view the usage by going to the My Services page and select the “plus sign” beside Azure Plan then select Usage Data or you can go to the Usage Data page.

On the Usage Data page, you will need to select the subscription then you can select the time period from the last 3 months, 6 months, 9 months or 12 months:

MY Company
To see your Company profile, you can go the My Company page. From there, you can update the phone number, website, email address, and address then click on Submit:

Note: The Company profile is different from your user profile. To locate your user profile, you can select the drop-down beside your name in the top right-hand corner then select Profile:

On the Profile page, you can update your First Name, Last Name, Email, Business Phone, Organization Name, Title and more. You can also select how you would like to be contacted. Once you’ve made any changes, you can select Update to save:

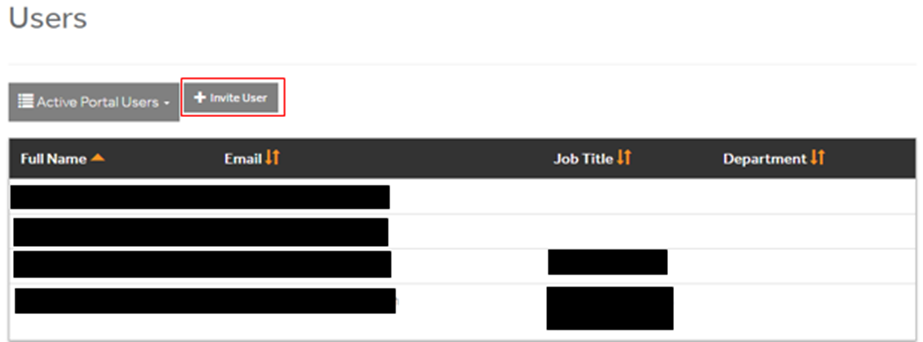
Manage users
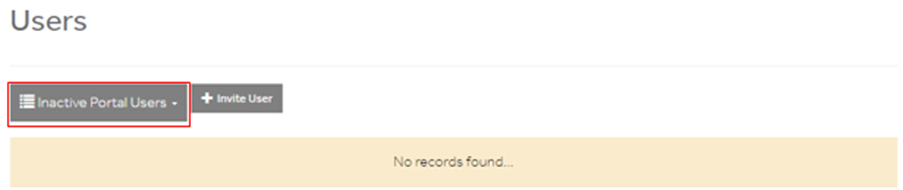
To invite a new user to the portal or see a list of Active/Inactive Portal Users, you can go the Manage Users page. From there, you can select Invite User to create a user account and fill out their First Name, Last Name and Office 365 Email ID then click on Submit:

After creating the user account, they will show up under Inactive Portal Users. To send an invitation, you will need to select their display name to go to the User Edit page. From there, you will need to select Associate under the web roles section to assign a role then select Enable Portal Access:
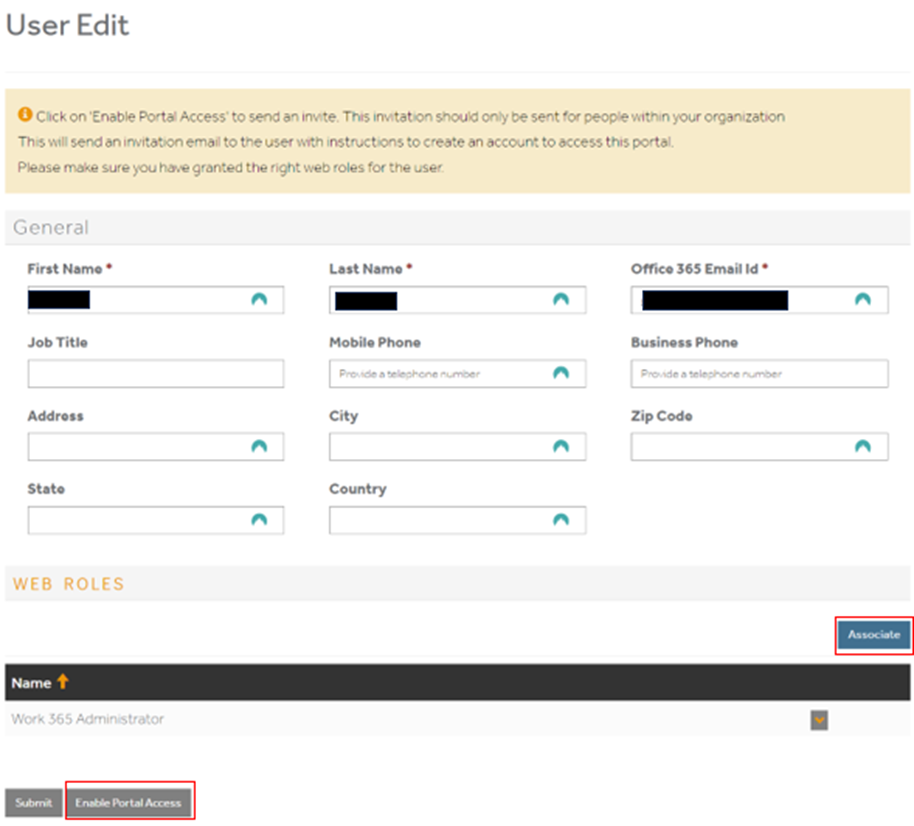
When assigning a role to a user, you choose any one of the following:
Work365 Administrator – has access to all menu items
Work 365 Subscription Manager – has access to subscription license and usage data
Work365 Finance Manager – has access to invoices and payment profiles
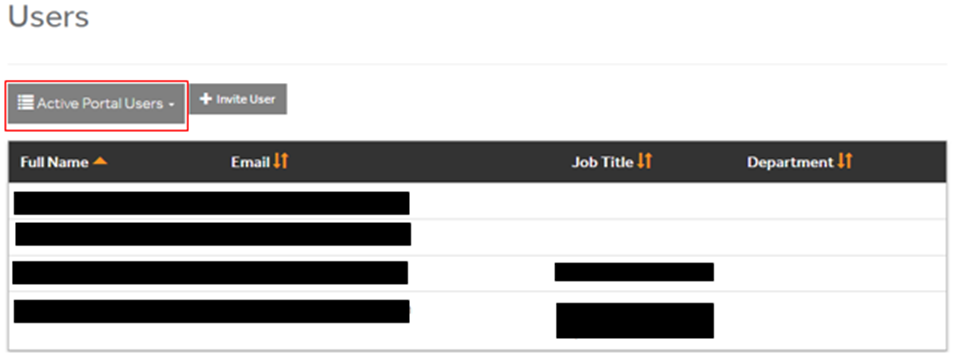
Once the invitation has been sent and the user has registered using the Invitation link, they will show up under Active Portal Users:
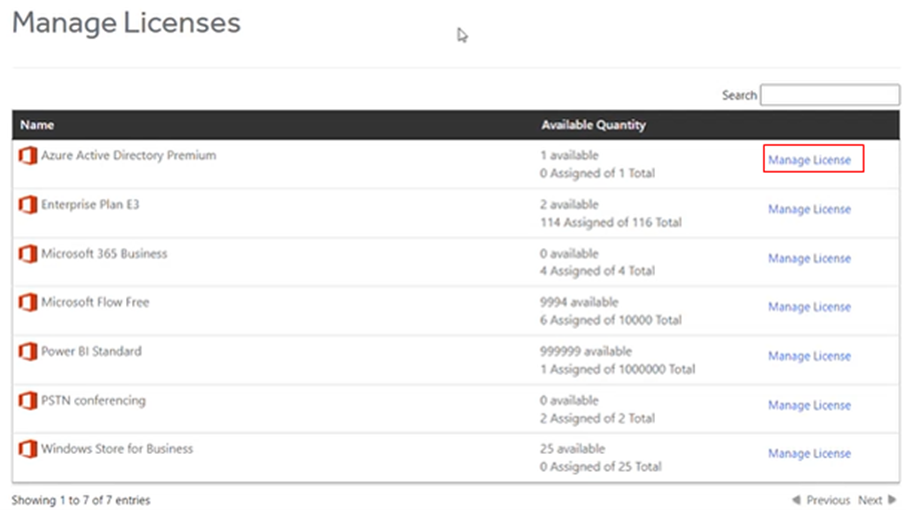
Manage Licenses
To assign or unassign licenses to your users, you can go to the Manage Licenses page. When accessing this page for the first time, there will be a pop-up for you to allow and you will have to provide consent on behalf of your organization as the Global admin and accept the permissions requested:


If you are not a Global Admin, you will have to provide a justification and request approval from the Global Admin:

Once your permissions have been approved, you can assign or unassign licenses to users by selecting Manage License:
Note: The name on the Manage Licenses page may not be the same exact name as what is reflecting on the My Services page or in the Microsoft 365 admin center. For example, Microsoft 365 Business is the same as Microsoft 365 Business Premium.
Once you select Manage License, a window will pop up with a list of users. From there you can turn on the toggle to assign a license or turn off the toggle to unassign a license then select Submit:


Once the license is updated successfully, there will be a notification at the top of the window. To close the window, you should select the grey area to go back to the Manage Licenses page.
Microsoft Support
To get answers to your Microsoft questions, you can type your message in the Opkalla Microsoft Support powered by Azure AI, also known as Spark AI (by Opkalla):

After you submit your question, the response will be generated along with reference using the following sources:
If you have any questions, feedback, or need further assistance with navigating through the portal, please feel free to reach out to us at support@opkalla.com.
Thank you for doing business with Opkalla!